Configuration the console server
1. Update your Pi and install ser2net
#sudo apt update
#sudo apt upgrade -y
#sudo apt install ser2net -y
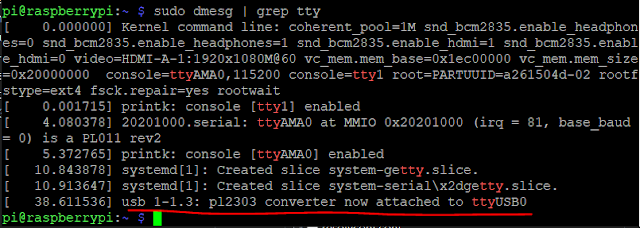
2. Find the serial adapters are listening on what port
#dmesg | grep tty
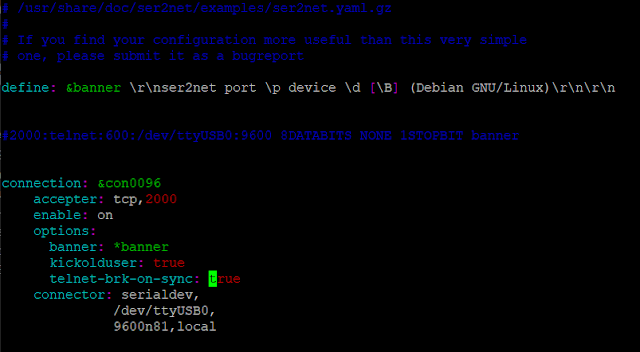
3. Configuration ser2net
#sudo nano /etc/ser2net.yaml
define: &banner \r\nser2net port \p device \d [\B] (Debian GNU/Linux)\r\n\r\n
connection: &con0096
accepter: tcp,2000
enable: on
options:
banner: *banner
kickolduser: true
telnet-brk-on-sync: true
connector: serialdev,
/dev/ttyUSB0,
9600n81,local
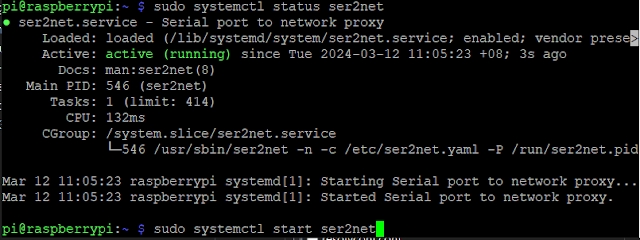
#sudo systemctl start ser2net
#sudo systemctl status ser2net
How to used the console server
1. Make sure the console server USB serial cable is connected to switch or any related device
2. Service ser2net is started. Noted the console server IP address
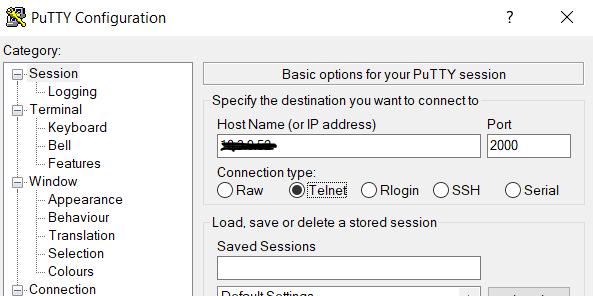
3. Open the telnet or ssh - Putty to telnet the console server
4. In Host-address : <console server IP> : port : <refer to the port setting in configuration>
5. Console to switch is open and now can do switch configuration
source : https://www.jpaul.me/2019/01/how-to-build-a-raspberry-pi-serial-console-server-with-ser2net/


